
Is it possible to access BarScan data from SQL Server 2012 (64 bit) using the 32 bit VFP OLEDB v9 Provider?
Answer: Yes.
Details:
There are several steps required to be able to access BarScan data using the 32 bit VFP OLEDB provider within a 64 bit SQL Server installation.
Approach
SQL Server 2012 64 bit cannot directly access data through a 32 bit provider. Hence, the approach described here is to create an SSIS (SQL Server Integration Services) package, then import the package into the Integration Services of the SQL Server instance. Once this is done, data can be moved from the Bar|Scan data to tables in SQL Server by running the SSIS package using a SQL Server Agent Job.
Please note that this tip is for tutorial purposes only and does not include error handling or any adjustments required for your particular installation.
Prerequisites
Before Bar|Scan data can be accessed, the following prerequisites are required to duplicate all the steps of this tip. Differences in SQL Server versions or Windows Server version may substantially change the steps as described here.
- Install the following software on the same physical or virtual machine:
- Windows Server 2012 R2
- SQL Server 2012 with the following minimal features selected:
- Database Engine Services.
- Integration Services.
- SQL Server Data Tools
- SQL Client Connectivity SDK
- Visual FoxPro OLEDB Provider.
- BarScan
Note: Microsoft recommends installing the latest version of SQL Server Data Tools. If you are familiar with BIDS (Business Intelligence Development Studio) from earlier versions of SQL Server, this has been replaced by the SQL Server Data Tools (SSDT). Also, it is possible for a BarScan installation to access files on a different server, but the files to be accessed here must be on the same server for this tip to work.
- Be aware of the following:
- Many issues arise when trying to access 32 bit data from 64 bit software. Most of the time these issues are poorly handled by the software being used and generally fall into one of three categories:
- An error message. Most often these appear to have nothing to do with the actual problem. They tend to be unexplainable, misdirecting or mysterious.
- Nothing is listed (such as when looking for the VFP OLD DB Provider in a list of providers) or nothing happens when an operation is executed.
- One method (such as using a Wizard) appears to generate errors but another, apparently equivalent method (such as creating an SSIS OLE DB Source) does not.
- SSDT and the VFP OLE DB provider do not like each other very much. You may be tempted to perform the tasks described in this tip in a different way than described, but many times this leads to SSDT crashing. This especially happens when using any Wizard buttons or selecting unnecessary operations.
- Many issues arise when trying to access 32 bit data from 64 bit software. Most of the time these issues are poorly handled by the software being used and generally fall into one of three categories:
- Verify the existence of the following Windows App Screen icons once all programs are installed:
- SQL Server Management Studio
- SQL Server Data Tools
64 bit vs 32 bit
There are many ways to execute an SSIS package. The environment plus the manner of execution is the primary way that determines whether the SSIS package is running in 32 or 64 bit mode. The SSIS package described here must run in 32 bit mode since it is accessing the data using a 32 bit OLE DB provider. Therefore, when executing the package be aware of the mode in which it is running. For example, when developing the SSIS package, the default debug mode is 64 bit. You can change this to 32 bit for debugging a single package by setting the Debugging Configuration Property ‘Run64BitRuntime’ to false. Debugging this single package will yield good results (assuming everything else is ok). However, problems may arise within SSDT when this package is executed as a child package. For example, if the 32 bit package (a child package) is executed from a 64 bit package (a parent package), the 32 bit package will be run in 64 bit mode despite the fact that it has been marked for 32 bit execution.
When running the package in a production environment SQL Agent determines the environment. The correct DTExec, whether 32 bit or 64 bit, must be selected. This is controlled by the Agent Job Step Property “Use 32 bit runtime”. This must have a check mark next to it.
In summary, be aware of how to enforce 32 bit operations in your specific environment.
Building the BarScan SSIS package
- Select the Windows Server 2012 R2 App Screen Icon ‘SQL Server Management Studio’.

- Within SQL Server Management Studio you must create an empty Tip database specifically for this tip. DO NOT use a production database.
- Right click on “Databases”.
- A context menu will appear. Select “New Database”.
- Fill in the database name . For this tip the name “TIPTARGET” has been selected.
- Click the “Ok” button. An empty database will be created.
- Select the Windows Server 2012 R2 App Screen Icon “SQL Server Data Tools”.

If you are unfamiliar with the resulting program, this is a version of Visual Studio specifically tooled for creation of SSIS packages.
- Create a new SSIS project.
- Select menu items “File-> New-> Project…”
- Select template “Integration Service” under “Business Intelligence”.
- Select the “Integration Service Project”.
- Name the project “BarScanOleDbSample”. This name is for this sample. You can name it anything you want.
- This is a good time to enforce 32 bit debugging. Right click the new SSIS project “BarScanOleDbSample” and select “Properties”. Within the Property pages select “Debugging” under “Configuration Properties”. Set the value of “Run64BitRuntime” to FALSE. This will enforce a 32 bit runtime for debugging purposes.
- Create the source and destination Connection Managers.
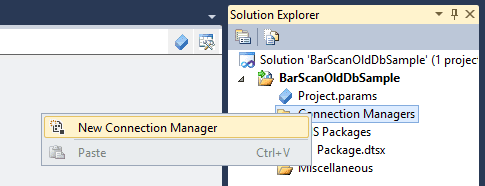
- Within “Solution Explorer”, right click on “Connection Managers”.
- Select “New Connection Manager”.
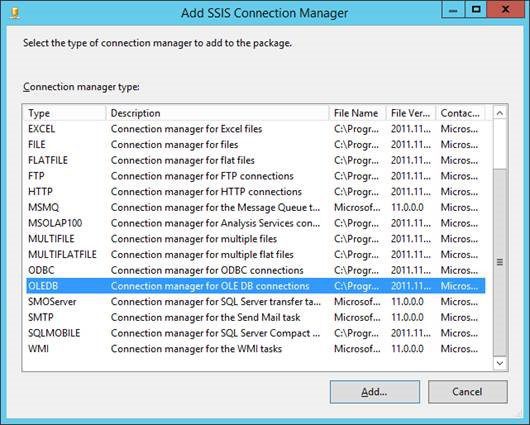
- Select the OLEDB connection manager type then select the “Add” button.
- You will see the ‘Configure OLE DB Connection Manager’ dialog. Select the “New” button to create a new connection manager.
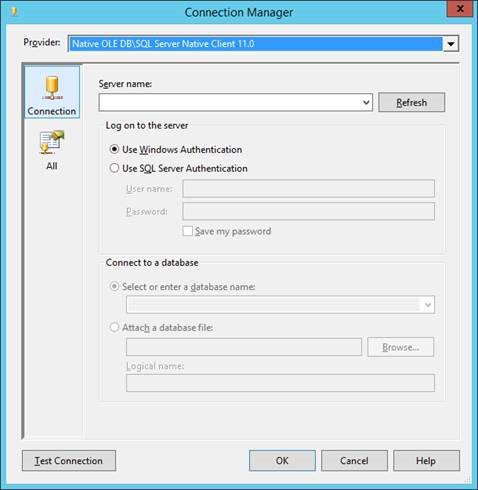
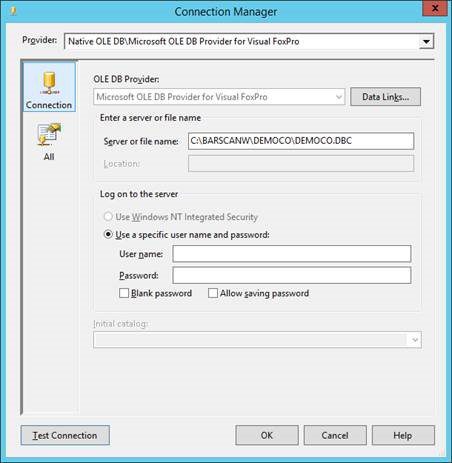
- The “Connection Manager” dialog appears with default values. It normally defaults to the “Native OLE DBSQL Server Native Client 11.0” provider. This needs to be changed. However, here is an image of what the default dialog looks like.
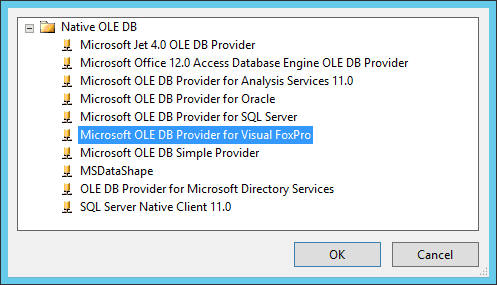
- Replace the Provider at the very top of the dialog with the “Microsoft OLE DB Provider for Visual FoxPro”. Do this by selecting the drop down button in the upper right corner of the dialog. A list of providers will appear. Select the Visual FoxPro provider then select “Ok”.
- The ‘Connection Manager’ dialog prompts will change to accommodate the new provider. Enter the fully qualified path of the filename to the BarScan company .DBC file in the ‘Server or file name’ prompt. Normally this will be the company file which contains the data that you want to access, but in this case this sample will be using the demonstration data in DEMOCO.DBC. Ignore the other prompts. Especially do not click on the ‘Data Links’ button as this may cause a crash. Select the ‘Test Connection’ button to verify that you have a good connection. The result will look something like this:
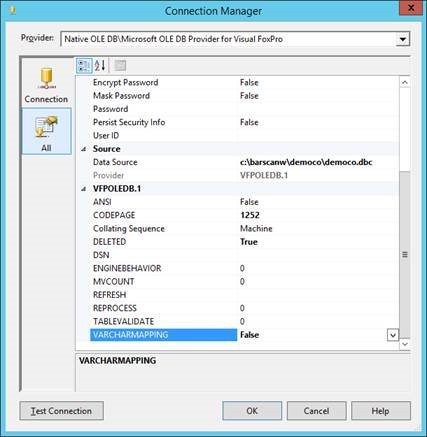
- Switch views to “All” by selecting the “All” item below the “Connection” item on the left side of the dialog. Scroll down and enter the CODEPAGE and VARCHARMAPPING values.
- CODEPAGE AUTO (current operating system code page)
- DELETED True (ignore deleted records)
- VARCHARMAPPING False (do not user VARCCHAR’S in query results). Note: Do not be tempted to use the ANSI setting to specify character sets. The VFPOLEDB ANSI setting has nothing to do with character sets. As per the Visual FoxPro documentation it “Specifies whether to pad a shorter string with spaces when making a SQL string comparison or binary expression with zero (0) bytes when making a binary expression comparison in SQL commands using the equal sign operator (=).” These are settings that the VFPOLEDB provider will use internally. The resulting dialog will look something like this:
- Select “Ok” to save this Data Connection.
- Repeat steps 3.a above through 3.e to create a new connection manager that will connect to your SQL Server table. This new connection manager will be provisioned to use the default “Native OLE DBSQL Server Native Client 11.0” provider.
- Verify that the provider is the “Native OLE DBSQL Server Native Client 11.0” provider.
- Select or fill in the SQL server name. In this tip it is “localhost”.
- Select or enter the database name. In this tip it is “TIPTARGET.”
- Select the “Test Connection” button to verify your connection.
- Select the “Ok” button to save your new connection manager. Note: This connection manager is being created to access a table in one of your SQL Server databases. It is recommended that you do NOT use a live or production table OR database until you are confident that your SSIS package is fully and correctly functional… certainly not if you are duplicating this tip for instructional purposes.
- The resulting list of connections will look something like this: the list will appear whenever you try to add or edit a connection manager.

You are now done creating the two needed connection managers.
- Create a new ‘Data Flow Task’ named “BarScanSampleDataFlowTask”.
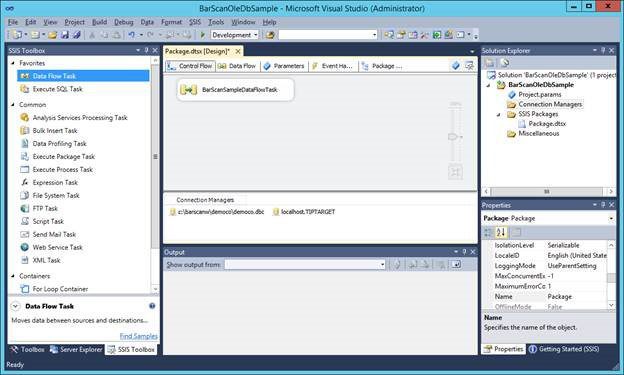
- This is a drag and drop operation. Select the SSIS Toolbox item “Data Flow Task” and drag it onto the “Control Flow” work surface. A new ‘Data Flow Task’ will appear.
- Rename it to “BarScanSampleDataFlowTask”.
- Right click on the data flow item and a context menu will appear. Select the “Rename” option then rename it.
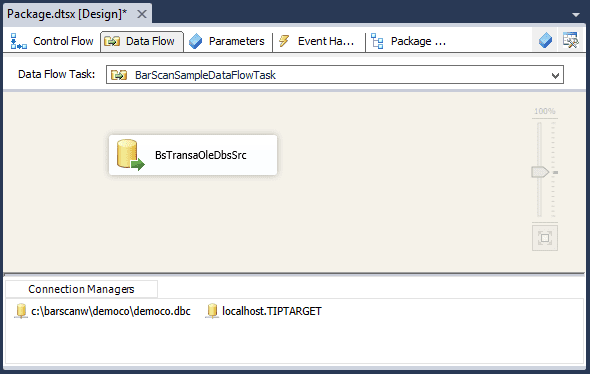
- The result so far will look like this:
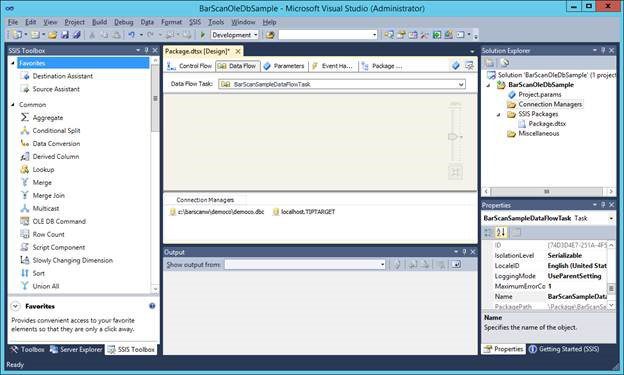
- Select the “BarScanSampleDataFlowTask”. It will become highlighted with a thicker black border.
- Create a Data Flow OLE DB Source called “BsTransaOleDbSrc”.
- Select the “Data Flow” tab at the top. Using the Data Flow task just selected, it will present a Data Flow work surface. It will look like this:
- Drag and drop from the left an “OLE DB SOURCE” onto the “Data Flow” work surface. It will validate the command. Likely it will draw a with an error marker. Do not worry, this will be corrected later.
- Right click on the new “OLE DB SOURCE” to get the context menu. Select the Rename option and rename it to “BsTransaOleDbSrc”.
- Right click on the new “BsTransaOleDbSrc” to get the context menu. Select the “Show Advanced Editor” option. You may or may not get a warning dialog like this:
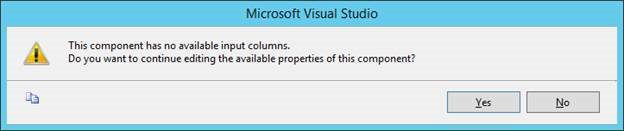
If so, select “Yes” to continue. - A dialog with tabs will appear for configuring the new OLE DB SOURCE. There are four tabs. Click on each tab in turn in the order listed below and configure each screen:
- “Connection Managers”.
- A list of Connection managers will appear (likely just one). There are three (3) columns for each connection manager.
- Set the OLE DB connection manager column value to “C:barscanwdemocodemoco.dbc” for this tip since this source is pointing to the BarScan data. It is important to note that this points to the company container file, not the actual table that you are trying to draw data from.
- “Component Properties”
- Verify that the Locale ID = “English (United States)”.
- Set “AlwaysUseDefaultCodePage” value to True.
- Verify that the DefaultCodePage = 1252
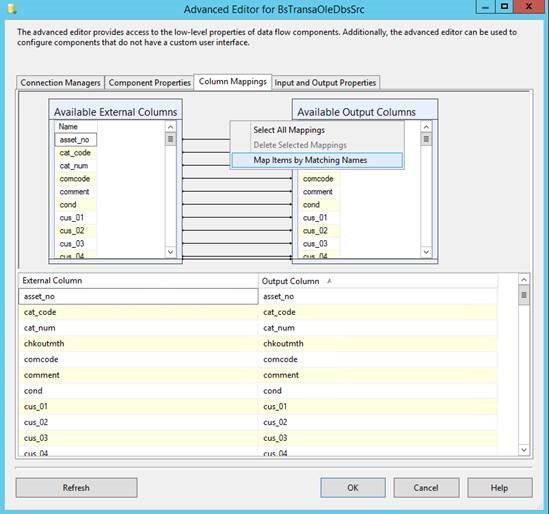
- “Column Matchings”
- Verify that that the columns you want to access in the BarScan Transaction table each are mapped to an available output column. For ease of use you can simply map all names by right clicking on the background between the Available External Columns and the Available Output Columns. You will get a context menu. Select “Match Items By Matching Names”. It should look like this:
- “Input and Output Properties” -Ignore this for now.
- Select the ‘Ok’ button to save.
- Verify that that the columns you want to access in the BarScan Transaction table each are mapped to an available output column. For ease of use you can simply map all names by right clicking on the background between the Available External Columns and the Available Output Columns. You will get a context menu. Select “Match Items By Matching Names”. It should look like this:
- A list of Connection managers will appear (likely just one). There are three (3) columns for each connection manager.
- Select the “Data Flow” tab at the top. Using the Data Flow task just selected, it will present a Data Flow work surface. It will look like this:
- Create an OLE DB Destination named “BsTransaOleDbDestination”.
- Verify that the “Data Flow” work surface is active for the BarScanSampleDataFlowTask. The Data Flow work surface should look something like this so far:
- Drag and drop from the left an “OLE DB DESTINATION”. Do NOT confuse it with any of the other similarly named OLE DB items in the SSIS Toolbox. Drop it onto the “Data Flow” work surface. It will validate the command. Likely it will draw a with an error marker. Do not worry, this will be corrected later.
- Right click on the new “OLE DB DESTINATION” to get the context menu. Select the Rename option and rename it to “BsTransaOleDbDestination”.
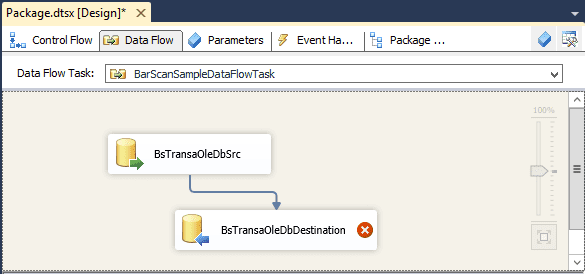
- Select the BsTransaOleDbSrc Data Flow item. Notice that two arrows appear pointing out of the bottom, a blue one and a red one. The red one is for handling errors, the blue one is for data completion. Select the blue one and drag it onto the BsTransaOleDbDestination item. The completed operation should look something like this:
- Right click on the new “BsTransaOleDbDestination” to get the context menu. Select the “Edit” option. Do not confuse this with the Advanced Edit option previously selected. You may or may not get a warning dialog like this:
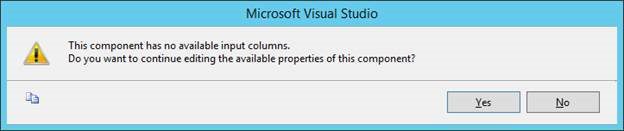
If so, select “Yes” to continue. - The OLE DB Destination Editor dialog will appear. It has a list box of items on the left side of the dialog. A set of properties exists for each of these items in the list box.
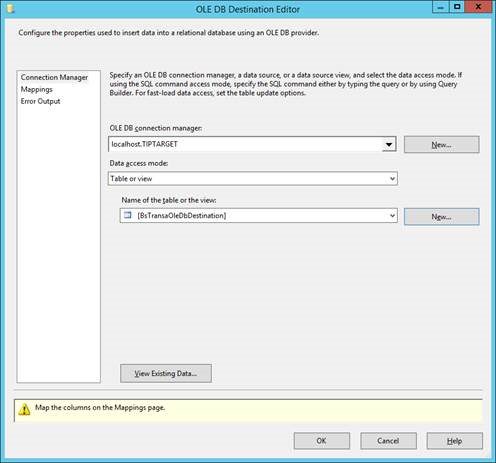
- Click on the “Connection Manager” item in the list box. Fill in the value for its properties as follows:
- “OLE DB connection manager”. Simply select the SQL Server target connection manager. In this case it is “Localhost.TIPTARGET”. This is selected as the target in this case because we are moving data FROM the BarScan bstransa table to the SQL Server table in TIPTARGET.
- Data Access Mode. In this tip select “Table or View”. When you make your own later this may change.
- “Name of the Table or View”. When doing your own production work, you will likely have your own table that you want to move data into. For this tip we will be creating a new table so that it exactly matches the data and data columns coming in from the BarScan BsTransa table.
- Click on the “New” button.
- A dialog will appear containing the text of a SQL CREATE TABLE command. This command will exactly match the structure of the incoming data. You can edit this command but do so only if you are positive that you know how to correctly do so.
- Select the OK button.
- A table will be created in your TIPTARGET database named after the current OLE DB DESTINATION ITEM. Since this one is called “BsTransaOleDbDestination” that is also the name of the table created. You can verify this by accessing your SQL Server Management Studio. If you do not see BsTransaOleDbDestination in the list of tables, right click on “Tables” and select context menu item “Refresh”.
- The resulting values as filled in should looks something like this:
- Click on the ‘Mappings’ item in the list box. It should automatically show the correct mappings of all of the columns. If it does not you can simply map all names by right clicking on the background between the Available Input Columns and the Available Destination Columns. You will get a context menu. Select ‘Match Items By Matching Names’.
- Click on the OK button to save.
- Click on the “Connection Manager” item in the list box. Fill in the value for its properties as follows:
- Verify that the “Data Flow” work surface is active for the BarScanSampleDataFlowTask. The Data Flow work surface should look something like this so far:
- Rename your SSIS package to ‘BsTransaSampleSsisPackage’. In your production version you will name this to something of your choice.
- Locate the ‘Solution Explorer’ in the SSTD.
- Locate the current project ‘BarScanOleDbSample’.
- Locate the list of packages under ‘SSIS Packages’.
- Rename the current package which has been named a default value such as ‘Package.dtsx’ to ‘BsTransaSampleSsisPackage.dtsx’.
- Save your work! Make sure that you have saved all of the work you have done (File/Save All).
- Test the Control flow ‘BarScan Sample Data Flow Task’. If successful, this will move data from the BarScan bstransa table to the bsTransaOleDbDestination table in the TIPTARGET database in SQL Server.
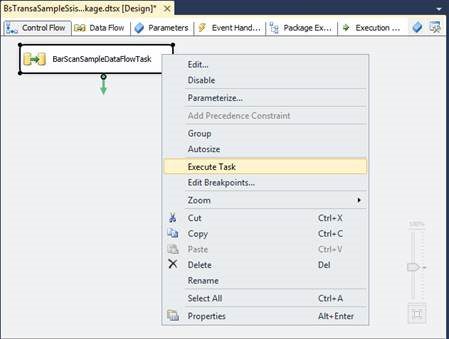
- Select the ‘Control Flow’ tab
- Right click on ‘BarScanSampleDataFlowTask’. The context menu will appear.
- Select the ‘Execute Task’ menu option.
- You can monitor progress by selecting the newly appearing ‘Progress’ tab. Here is an image of a completed task.
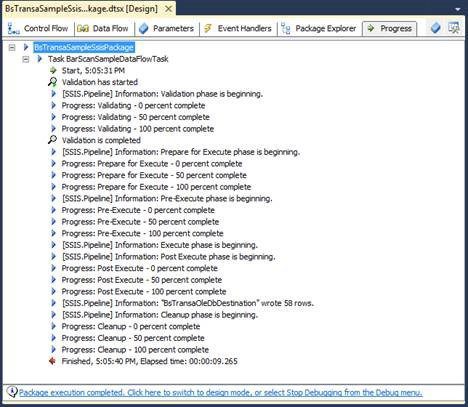
- When you see the ‘Finished’ entry, close the package execution phase by clicking on the message at the bottom of the Progress tab.
- Check the contents of the BsTransaOleDbDestination table in the TIPTARGET company. The BarScan Democo table ‘bsTransa’ has 58 records as of the time of the creation of this tip. You should see 58 records (or a multiple of that amount if you run it more than once) in the BsTransaOleDbDestination table.
- If the data is not there, double check the ‘Progress’ list for errors.
- Save your work! (File-> Save All).
- Your sample SSIS package is complete.
Importing the SSIS package into SQL Server
- Select the Windows Server 2012 R2 App Screen Icon ‘SQL Server Management Studio’.

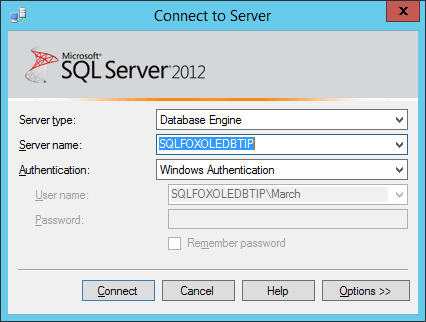
- Connect to the server you have selected for duplicating this tip. For this tip the server provisioned has been called ‘SQLFOXOLEDBTIP’ and uses Windows Authentication.
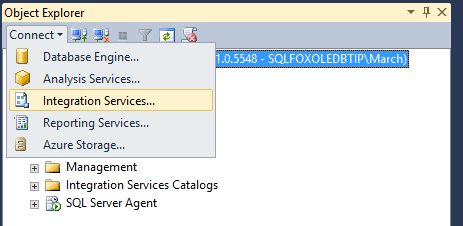
- In the ‘Object Explorer’ of the SQL Server Management Studio select the ‘Connect’ drop down and select the ‘Integration Services’ item. Note: if this option does not appear or you cannot connect to Integration Services, verify that it has been installed.
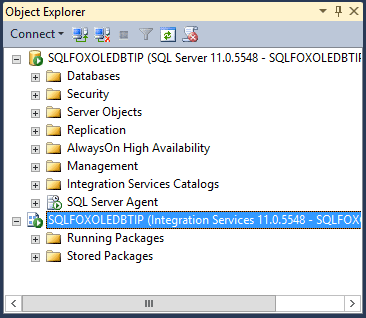
- Once you have connected to both the Database Engine and the Integration Services the Object Explorer will look something like this:
- Import the BsTransaSampleSsisPackage.
- Open item ‘Stored Packages’
- Right click on item ‘File System’. A context menu will appear.
- Select ‘Import Package…’ in the context menu.
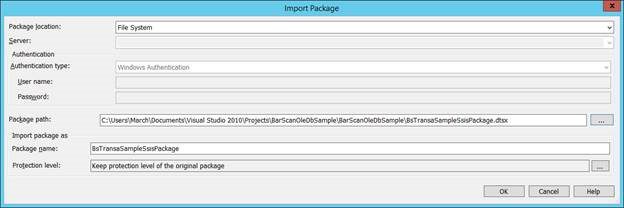
- A dialog will appear. Under ‘Package Path’ enter or browse to the fully qualified path of the new SSIS package you have just created (for this tip it is ‘BsTransaSampleSsisPackage’. Once selected it will automatically insert the Package name as well. Here is a filled dialog for this tip.
- Select the ‘Ok’ button to import.
Running the SSIS package
The newly created SSIS package is run within SQL Server using a SQL Server Agent Job. To run the newly created SSIS package a job must be created and then the SSIS package must be referenced within one of its Job Steps. If you are unfamiliar with SQL Server Agent Jobs, within each job the individual operations of the job are called Job Steps.
- Create a SQL Server Agent Job.
- Right click on the ‘Jobs’ entry under ‘SQL Server Agent’.
- A context menu will appear. Select ‘New Job…’.
- The New Job entry dialog will appear.
- Select page ‘General’.
- Enter the Job Name of your choice. For this tip you may enter ‘BsTransaSampleJob’.
- You may optionally select a job Category.
- Verify that the ‘Enabled’ value does NOT have a check mark. This is needed to prevent accidental execution until you complete the job description and scheduling.
- Select page ‘General’.
- Create a new Job Step
- Select page ‘Steps’ in the New Job dialog.
- At the bottom of the page, add a new Job Step by selecting the ‘New…’ button.
- The ‘New Job Step’ dialog will appear.
- Enter a name of your choice for this step in the job. For this tip you may enter ‘BsTransaSsisStep’.
- Select the step Type. This must be a ‘SQL Server Integration Services Package’. Once selected, the prompts below it will change to reflect the values that must be specified.
- Select the ‘Run As:’ value. This must be ‘SQL Server Agent Service Account’.
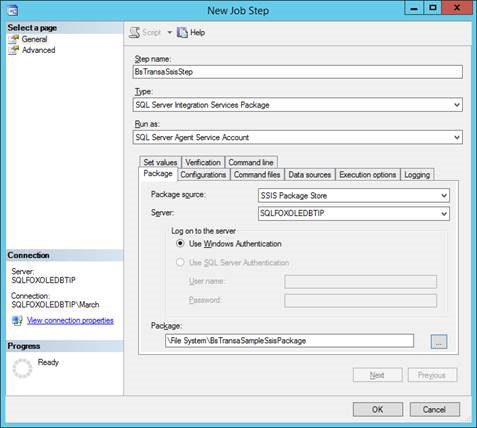
- Within the ‘Package’ tab.
- Select the ’Package Source’. Since we have imported the package we can select the value ‘SSIS Package Store’. Note that additional tabs will appear once this selection is made.
- Select the server. This is the server that you are using. For this tip the server used was ‘SQLFOXOLEDBTIP’. Make sure you enter your server name, not SQLFOXOLEDBTIP.
- Select the ‘Package…’ value. This is easiest done by browsing for it by selecting the ‘…’ button. Locate and enter the package for this tip, ‘BsTransaSampleSsisPackage’.
- Here is an image of the ‘New Job Step’ dialog for the ‘General’ page so far.
- Select the ‘Execution Options’ tab.
- Put a check mark next to the ‘Use 32 bit runtime’ checkbox.
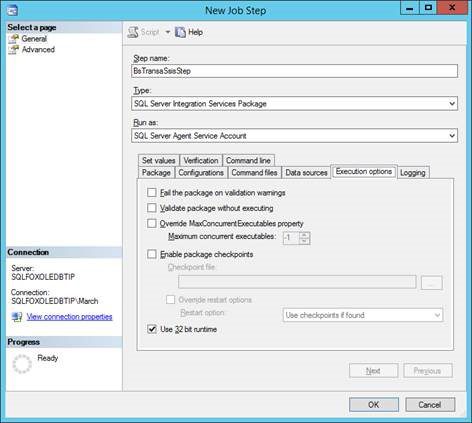
- Save this Job Step by selecting the ‘Ok’ button.
- Save this Job by selecting the ‘Ok’ button in the ‘New Job’ dialog.
- The basics of your new Job are complete. However, it still needs scheduling and it must be re-enabled. Additionally, you may encounter errors running the job if the wrong account or an account with insufficient privileges is used. For example, to run a file based SSIS package using the ‘ServiceSQLSERVERAGENT’ account you will need to grant that account access to the file system. Alternatively, you could set up a proxy account.
Enhancements and Warnings needed for real world use
This sample created in this tip has many shortcomings and is not suitable for real production use. It has no error checking and every time it runs it will add the contents of the BarScan bstransa table to the dbo.BsTrasnsaOleDbDestination table. For example, the data flow of the ‘BarScan SampleDataFlowTask’ needs to be enhanced to update existing records and only add new ones if they do not already exist in the SQL Server table. Additionally, writing asset information back into any table other than the bstransa table may cause serious damage to the data integrity of the BarScan program. Any BarScan table may be read, but only bstransa may be written to. Additionally, BarScan tables do not allow nulls in any field. Writing nulls, even in BsTransa will compromise data integrity.